Sunday, December 27, 2009

Building Inkscape (v0.47) Binary Package in Slackware 13.0 using SBo (SlackBuild.org) SlackBuild Script and SBOPKG Tool


Diagram on the left side shows the build dependency order to compile Inkscape (v0.47) source in Slackware 13.0. "graphviz", "lxml" and "numpy" are optional, but for better functionality it is strongly recommended to install them also.

You can find information about dependencies for any package in README file in SlackBuild archive file. Here is the ftp repository of SBo (SlackBuilds.org). Tracking dependency order for the package you wish to install and checking over each of README files of tracked dependencies to explore whether any other dependencies exist or not, you can easily make a complete dependency diagram for compilation of intended package as on the left side. Synchronize your Sbopkg package list with the SBo repository and place all dependencies and intended package in correct order in SBOPKG build queue before begining to compilation process and then start to build programs and libraries in the list. Here is the docs/help page of SBOPKG.


Friday, November 27, 2009

aMSN 0.98.1 is released!


Most of the people around me use Microsoft's "MSN" for instant messaging and MSN is indispensable part of their computer culture. Up to now, I made many of my close friends migrate to GNU/Linux and ordinarily exposed to many questions about this OS. One of the questions requested to me is that whether Microsoft's MSN works on GNU/Linux operating systems or not. There is a number of MSN client software for GNU/Linux, but most of them do not satisfy the new migrants. At that point, "aMSN" becomes prominent, because in the view of functionality and visual appearance, it resembles to Microsoft's "MSN" most.

Now let us build aMSN native "Slackware 13" binary package using SBo SlackBuild script. Today 27th of November 2009 and there is no SlackBuild script for aMSN 0.98.1 on SBo homepage :(. But do not worry :), it is possible to build aMSN 0.98.1 binary using previous (0.97.2) SBo SlackBuild script. Just replacing source tarball with latest source tarball (0.98.1) and editing SlackBuild script for the new source version and archive type, you can easily build aMSN 0.98.1 binary package for "Slackware 13".

"aMSN 0.98.1 Source", "aMSN 0.97.2 SBo SlackBuild", "aMSN 0.97.2 SBo CPG Signature"

$ wget http://topraksuenerji.org/open_source/amsn-0.98.1.tar.gz
$ wget http://topraksuenerji.org/open_source/amsn.tar.gz
$ wget http://topraksuenerji.org/open_source/amsn.tar.gz.asc
$ tar -zxvf amsn.tar.gz
$ mv amsn-0.98.1.tar.gz amsn.tar.gz.asc amsn
$ cd amsn
$ nano amsn.SlackBuild


Edit aMSN SlackBuild script as in above snapshot and save then log in as root with "su". Now, you are ready to execute the script.

# ./amsn.SlackBuild

Clean old aMSN installation, if exists.

# removepkg amsn

Install aMSN 0.98.1 by;

# installpkg /tmp/amsn-0.98.1-*_SBo.tgz

Saturday, September 5, 2009

Printing to a Windows printer via Samba in Slackware

You want to print from a Slackware machine to a printer that is connected to a Windows machine on the same LAN. To achieve this, Windows host must have a share for this printer with a specified share name. Then it is easy to configure a Windows printer from a GNU/Linux client (Slackware machine) via SAMBA and CUPS.


One can share files and printers between GNU/Linux and Windows machines over a network via SAMBA. CUPS provides a portable printing layer for UNIX-based operating systems such as GNU/Linux and Mac OS X. Latest Slackware release (Slackware 13) includes both "samba'" and "cups" packages. If you did not install these packages while installation, install them from the main tree in the installation DVD. Make sure that samba and cups run at startup by making /etc/rc.d/rc.samba and /etc/rc.d/rc.cups executable.

# chmod 755 /etc/rc.d/rc.samba
# chmod 755 /etc/rc.d/rc.cups

Create a samba configuration file by;

# mv /etc/samba/smb.conf-sample /etc/samba/smb.conf

Now you need to start samba and cups services by;

# /etc/rc.d/rc.samba start
# /etc/rc.d/rc.cups start

To configure a Windows printer properly via Samba and CUPS, you need to know the name of the work group of the Windows printer host (not always required), NET-BIOS host name of the Windows printer host (always required) and share name of the Windows printer (always required).

You can view shared printers and disks on a Windows machine by smbclient command with below options.

$ /usr/bin/smbclient -L net-bios_host_name_of_the_windows_machine -N

For my case, ertan is the NET-BIOS host name of my Windows box.

bash-3.1$ smbclient -L ertan -N

Domain=[ERTAN] OS=[Windows 5.1] Server=[Windows 2000 LAN Manager]

Sharename Type Comment
--------- ---- -------
IPC$ IPC Uzak IPC
D$ Disk Varsayılan değer
Belgelerim Disk
print$ Disk Yazıcı Sürücüleri
HpDeskjet1280 Printer HP Deskjet 1280
ADMIN$ Disk Uzak Yönetici
C$ Disk Varsayılan değer
Domain=[ERTAN] OS=[Windows 5.1] Server=[Windows 2000 LAN Manager]

Server Comment
--------- -------

Workgroup Master
--------- -------
bash-3.1$

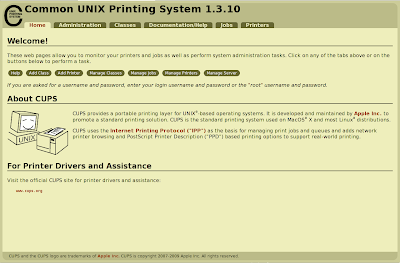
Connect to CUPS administration panel by typing http://localhost:631/ into your favorite browser and add Windows printer to CUPS as following.

Add New Printer --> 
Name: Specify a name
Location: Specify a location
Description: Enter a description
Device: Windows Printer via SAMBA
Device URI: smb://server/printer
or
smb://workgroup/server/printer

or

smb://username:password@server/printer

or

smb://username:password@workgroup/server/printer

Manufacturer and Model Name: Choose driver

For Device URI (Uniform Resource Identifier), insert the correct server and printer share name. If system needs wokgroup, username and password, insert them correctly also.

(workgroup: Name of the work group of the Windows printer host
server: NET-BIOS host name of the Windows printer host
printer: Share name of the Windows printer
username:password: Username and password authorized to use the shared printer on the Windows machine)

For manufacturer and model type, variety of drivers will be listed, because Slackware includes "Gutenprint" (formerly Gimp-Print) driver package.

Finish printer installation verifying root user name (root) and password (root's password) and print a test page to check whether your samba network printer installation successfully performed or not.

Saturday, August 29, 2009

Slackware 13.0 is released!

After one of the most intensive periods of development in Slackware's history, the long awaited stable release of Slackware 13.0 is ready. This release brings with it many major changes since Slackware 12.2, including a completely reworked collection of X packages (a configuration file for X is no longer needed in most cases), major upgrades to the desktop environments (KDE version 4.2.4 and Xfce version 4.6.1), a new .txz package format with much better compression, and other upgrades all around -- to the development system, network services, libraries, and major applications like Firefox and Thunderbird. We think you'll agree that this version of Slackware was worth the wait. Also, this is the first release of Slackware with native support for the 64-bit x86_64 architecture! Major kudos to Eric Hameleers for all of his work, especially on the 64-bit port.

More details may by found in the official announcement and in the release notes.

Please consider supporting the Slackware project by picking up a copy of the Slackware 13.0 release from the Slackware Store. The discs are off to replication, but we're accepting pre-orders for the official 6 CD set and the DVD. The CD set is the 32-bit x86 release, while the DVD is a special edition dual-sided disc with the 32-bit x86 release on one side and the 64-bit x86_64 release on the other. And, we still have T-shirts and other Slackware stuff there, so have a look around. Thanks to our subscribers and supporters for keeping Slackware going all these years.

Thanks are again due to the Slackware crew, the developers of slackbuilds.org, the community on linuxquestions.org, Slackware IRC channels, and everyone else who helped out with this release.

Have fun, and enjoy the new stable release!

Pat and the Slackware crew

Source: http://www.slackware.com

Tuesday, August 11, 2009

Enabling color support of "ls" in Bash

I have noticed that executing ls command in "Terminal" and "Xterm" does not give me colorful output as in "Konsole". To get colorful output in these X terminals in bash, add below lines to your ~/.bashrc file and restart X terminal.

# enable color support of ls and add handy aliases
if [ "$TERM" != "dumb" ]; then
eval "`dircolors -b`"
alias ls='ls --color=auto'
alias dir='ls --color=auto --format=vertical'
alias vdir='ls --color=auto --format=long'

fi

To enable the same function for your root shell, add above lines to /root/.bashrc file.


Sunday, July 19, 2009

Booting Slackware with GRUB (GNU Grand Unified Bootloader)

GRUB is an alternative bootloader to LILO. As you know, Slackware comes with LILO as default. Slackware has legacy version of GNU GRUB package in /extra section. This package also includes Ken Robotti's 'grubconfig' tool similar to 'liloconfig' tool. Now we are going to simply remove LILO package and install GRUB package (I assume that you have configured 'slackpkg' utility).

# removepkg lilo
# slackpkg install grub

Run grubconfig by:

# grubconfig


I prefer expert GRUB setup menu.


Start to create GRUB config file with a GRUB header.


Choose frame buffer console size.


Select GRUB target location. I had installed LILO onto the master boot record of my hard drive. Choosing GRUB install location as MBR overwrites LILO.


Choose the GRUB files save location. This is the location where /boot directory is located. In my case, /dev/sda1 is the root partition of my Slack and consists of /boot directory.


Add your Slackware partition with Linux option. Using Linux and Other options, you can add other operating systems you have to GRUB configuration file.


Finally install GRUB with Install option.

You can change GRUB VGA resolution for more readable booting by editing /boot/grub/menu.lst file.

# nano /boot/grub/menu.lst

# GRUB configuration file '/boot/grub/menu.lst'.
# generated by 'grubconfig'. Sun Jul 19 01:55:59 2009
#
# The backup copy of the MBR for drive '/dev/sda' is
# here '/boot/grub/mbr.sda.3676'. You can restore it like this.
# dd if=mbr.sda.3676 of=/dev/sda bs=512 count=1
#
# Start GRUB global section
#timeout 30
#color light-gray/blue black/light-gray
# End GRUB global section
# Linux bootable partition config begins
title Slackware-current on (/dev/sda1)
root (hd0,0)
kernel /boot/vmlinuz root=/dev/sda1 ro vga=794
# Linux bootable partition config ends
title --- For help press 'c', type: 'help'
root (hd0)
title --- For usage examples, type: 'cat /boot/grub/grub.txt'
root (hd0)

Find vga=xxx part in /boot/grub/menu.lst file and replace xxx with a suitable VGA code from the below table.


Sunday, July 12, 2009

Slackware for ARM

Slackware has a new official port for the ARM architecture, by the name of ARMedslack, which has recently released the port of Slackware version 12.2.

ARMedslack began in 2002 by Stuart Winter, with the primary goal of providing a full Slackware port for ARM desktop machines - initially targeting the Acorn StrongARM RiscPC, and later embedded devices.

Slackware ARM now supports native installation using the regular Slackware installer on the ARM Versatile board (via the QEMU emulator) and the recently announced embedded device: the Marvell SheevaPlug.

Slackware ARM version 12.2 is built for armv4, little endian, "legacy" ABI. A new port to the EABI is already underway and expected to be available in "-current" form within a few months.

The project's homepage has more details.

Source: http://www.slackware.org/


Monday, June 22, 2009

VNC Based Free Remote Control Software "TightVNC"

VNC (Virtual Network Computing) is a client/server sotfware which allows you to view desktop of a remote computer (VNC server) and control it from your computer (VNC viewer) with your local mouse and keyboard. VNC can be installed on any type of operating system (Unix, GNU/Linux and Windows). VNC also has a java viewer package for viewing a remote computer's desktop within a browser without installing software. It does not matter whether two computers have the same OS or not, VNC viewer and VNC server interact regardless of OS type.


Picture Source: http://www.realvnc.com/

VNC Based Free Remote Control Software "TightVNC"

TightVNC is a free, GPL licensed and enhanced version of VNC sofware. For detailed information look at TightVNC information page.

Currently Slackware-curent has TightVNC package in /extra section. You can also obtain TightVNC slackbuilds for Slackware 12.0, 12.1 and 12.2 versions on Slackbuilds.org.

Now I am going to explain how to establish desktop connection between two Linux machines on the same LAN.

TightVNC server machine: GNU/Linux Ubuntu (192.168.2.5)
TightVNC client machine: GNU/Linux Slackware

Install TightVNC server and TightVNC viewer on Ubuntu by:

sudo apt-get install tightvncserver
sudo apt-get install tightvncviewer

After installing TightVNC package on both machines (server and client), execute below command from user terminal of server machine (the computer you want to view its desktop) to start VNC server.

vncserver

After executing above command you will be prompted to create server access password for first time. Create a secure password and start server. After starting VNC server, an X desktop will be started with a specified number.

user@ubuntubox:~$ vncserver

New 'X' desktop is ubuntu:1

Starting applications specified in /home/user/.vnc/xstartup

Log file is /home/user/.vnc/ubuntu:1.log

user@slackbox:~$

VNC server started an X desktop with number "1". Now server computer is ready for clients.

To have desktop access on server machine through TightVNC, execute below command on your computer (client machine).

vncviewer local_ip_of_vncserver_machine:desktop_number

For my case;

vncviewer 192.168.2.5:1

After executing above command you will be prompted to enter server's access password. Enter password and enjoy!


Wednesday, June 17, 2009

X11 forwarding over SSH in Slackware

SSH is a program for logging into a remote machine and for executing commands on a remote machine. It is possible to run X Window graphical applications over SSH also. X forwarding allows you to run remote X applications that open their windows on your local display.

To establish an X Window connection over SSH:

1. Make sure that openssh package has installed and ssh service is active on both server and client machines.
(OpenSSH is free version of SSH)

2. Login to server machine (remote computer) using SSH

ssh remote_user_name@remote_machine

and edit remote computer's /etc/ssh/sshd_config file as remote root adding following lines and save.

AllowTcpForwarding yes
X11Forwarding yes
X11DisplayOffset 10
X11UseLocalhost yes


3. Restart ssh service on remote machine by executing following command as remote root.

/etc/rc.d/rc.sshd restart

4. On client machine (your computer), edit /etc/ssh/ssh_config file as root adding following lines and save.

ForwardAgent yes
ForwardX11 yes


5. To establish SSH connection with configured remote machine, execute following command from an X Terminal Emulator.

ssh -Y remote_user_name@remote_machine


6. After logging into remote machine, execute below command to check the value of display variable in remote host environment.

echo $DISPLAY

If you do not see anything when typing above command, set value by executing:

export DISPLAY=localhost:10.0

Now try to launch an X application on remote machine from client machine, for example:

xlogo &

* /etc/ssh/sshd_config and /etc/ssh/ssh_config files have required lines for X11 forwarding in commented form as system default. Instead of adding new lines, just uncomment related lines and check parameters.

* You need to open port "22" on remote network for WAN connections over SSH.

Thursday, June 11, 2009

Parted Magic (A Free Partitioning Tool)

Parted Magic is a mini OS (v4.1 is about 90 MB) mainly aims to partition hard drives using GParted and Parted programs. Partition Image, TestDisk, fdisk, sfdisk, dd and ddrescue are the other programs included by Parted Magic. Parted Magic supports the following file systems: ext2, ext3, ext4, fat16, fat32, hfs, hfs+, jfs, linux-swap, ntfs, reiserfs, reiser4, and xfs. You can operate Parted Magic from CD, USB storage, HDD and PXE server. For more information, look at the documentation page on Parted Magic homepage.


Friday, June 5, 2009

Ndiswrapper in Slackware

Sometimes native Linux drivers are not available for some network cards, because some vendors do not release specifications of the hardware for their wireless network cards. Ndiswrapper is an Open Source Project Software by which unsupported wireless network devices can be used on Unix-like operating systems using Microsoft Windows drivers.

I have a wireless USB network card (Airties WUS-300) which does not have Linux driver. I can find only Windows driver on vendor's support page. But, it is possible to use this USB wireless network card in Slackware with Ndiswrapper.

Installing "Airties WUS-300 Wireless USB Network Stick" driver with Ndiswrapper in Slackware 12.2

1. Build and install "ndiswrapper" package from SlackBuild.org. For building instructions read HOWTO page.

2. Extract Windows driver of your wireless network card and then be sure about that you have extracted ".INF" file.

(Some Windows drivers are distributed as compressed content of CD image and include "autorun.inf" file. Be carefull, this is not the file that we need!)

(Some other Windows drivers are in the form of ".exe". If you are lucky, unrar or unzip will extract ".exe" files on GNU/Linux. But sometimes these tools do not extract ".exe" files, in this case you need a Windows box and Universal Extractor which is an Open Source Software to extract any type of archive including ".exe" files.)

3. Open a terminal emulator and change your directory to where ".INF" file is located.

4. Now using ".INF" file, install wireless card driver by executing below command.

# ndiswrapper -i file_name.INF

(Replace file_name with the name of your ".INF" file)

5. Check whether installation was done correctly or not by:

# ndiswrapper -l


6. Load ndiswrapper kernel module by executing:

# /sbin/modprobe ndiswrapper


7. Executing

# ndiswrapper -m

writes an alias for "wlan0" into module configuration file /etc/modprobe.d/ndiswrapper so that ndiswrapper kernel module is loaded automatically when this interface is used.

8. Restart "wlan0" interface by:

# /etc/rc.d/rc.inet1 wlan0_restart

9. Execute below command to see whether your device has an available interface or not.

# iwconfig

If you do not see anything related with your wireless card, remove wireless card from computer and plug in, then execute iwconfig again.

10. To make ndiswrapper kernel module load on every boot add following red line to /etc/rc.d/rc.modules file.

/sbin/modprobe ndiswrapper

11. Now you need to configure your wireless network interface "wlan0". You can configure network manually but there is a software which is called "Wicd" configures network instead of you. Wicd is available in the /extra section of Slackware 12.2. Download Wicd package and simply install it by installpkg.

After installing Wicd, launch program by executing:

$ wicd-client &

Set default wireless interface as "wlan0" from "Preferences > General Setting > Wireless Interface" and connect to your wireless network.


As a Slackware fun sometimes I get annoyed with using Wicd, because you loose direct control on system and you can not learn anything about network configuration except Wicd. This is inconsistent with the Slackware philosophy.

Thursday, June 4, 2009

Revolution OS


Revolution OS Homepage

REVOLUTION OS tells the inside story of the hackers who rebelled against the proprietary software model and Microsoft to create GNU/Linux and the Open Source movement.

On June 1, 2001, Microsoft CEO Steve Ballmer said "Linux is a cancer that attaches itself in an intellectual property sense to everything it touches."

Microsoft fears GNU/Linux, and rightly so. GNU/Linux and the Open Source & Free Software movements arguably represent the greatest threat to Microsoft's way of life. Shot in cinemascope on 35mm film in Silicon Valley, REVOLUTION OS tracks down the key movers and shakers behind Linux, and finds out how and why Linux became such a potent threat.

REVOLUTION OS features interviews with Linus Torvalds, Richard Stallman, Bruce Perens, Eric Raymond, Brian Behlendorf, Michael Tiemann, Larry Augustin, Frank Hecker, and Rob Malda. To view the trailer or the first eight minutes go to the ifilm website for REVOLUTION OS.

Companies such as Hewlett-Packard, IBM, Oracle, Wipro, Ogilvy & Mather, OSTG, and Dreamworks Animation have rented REVOLUTON OS for private theatrical screenings. It has also screened in numerous film festivals including South By Southwest Film Festival, the Atlanta Film & Video Festival, Boston Film Festival, and Denver International Film Festival. REVOLUTION OS won Best Documentary at both the Savannah Film & Video Festival and the Kudzu Film Festival.

REVOLUTION OS is available in the 35 mm motion picture format and runs 85 minutes.

Source: http://www.revolution-os.com/

Activating Unicode/UTF-8 Support and Changing Default Locale Language in Slackware

For a list of locales which are supported by your Slackware box, type:

$ locale -a

If you have full installation of Slackware, all languages will be listed.

To get UTF-8 support, edit lang.sh file as root by:

# nano /etc/profile.d/lang.sh

Comment default locale and add uncommented line

export LANG=en_US.UTF-8


to lang.sh file as in below.

#!/bin/sh
# Set the system locale. (no, we don't have a menu for this ;-)
# For a list of locales which are supported by this machine, type:
# locale -a

# en_US is the Slackware default locale:
# export LANG=en_US

export LANG=en_US.UTF-8

# 'C' is the old Slackware (and UNIX) default, which is 127-bit
# ASCII with a charmap setting of ANSI_X3.4-1968. These days,
# it's better to use en_US or another modern $LANG setting to
# support extended character sets.
#export LANG=C

# There is also support for UTF-8 locales, but be aware that
# some programs are not yet able to handle UTF-8 and will fail to
# run properly. In those cases, you can set LANG=C before
# starting them. Still, I'd avoid UTF unless you actually need it.
#export LANG=en_US.UTF-8

# Another option for en_US:
#export LANG=en_US.ISO8859-1

# One side effect of the newer locales is that the sort order
# is no longer according to ASCII values, so the sort order will
# change in many places. Since this isn't usually expected and
# can break scripts, we'll stick with traditional ASCII sorting.
# If you'd prefer the sort algorithm that goes with your $LANG
# setting, comment this out.
export LC_COLLATE=C

# End of /etc/profile.d/lang.sh


After modifying lang.sh file, save it and reboot your computer.

To change your computer's locale language, replace "en_US" with your locale code "tr_TR, en_GB, en_CA, etc..." in lang.sh file and save, then reboot your computer.

Wednesday, June 3, 2009

Open Source Map


Open Source Activity Map | Open Source Environment Map

About this Map

Explore open source software hotspots around the world through the interactive Open Source Index, or OSI, based on research by the Georgia Institute of Technology (Georgia Tech). The OSI is a measure of the open source activity and environment in 75 countries. Each country is given a score based on its policies, practices, and other data in the fields of Government, Industry, and Community.

Click on a country to see the country's rank (1 being the highest, 75 being the lowest) in open source activity. One map shows Activity, which measures the amount of open source happening today. It tends to be made up of concrete factors, such as existing open source and open standards policies and number of OSS users, such as Linux and Google.

You can also see an Environmental map, which is more speculative. Even a country that does not have a high degree of current penetration of open source may have a high number of internet users and information technology patents. These factors may indicate a favorable environment for open source software to take hold.

About the Popups

When you click on a country, you can see its overall rank among the 75 countries in the index, as well as its rank for Government, Industry, and Community factors. Government factors include open source procurement policies and support for open source. Industry factors include the number of registered OSS users per capita and internet growth. Community factors include the number of applications to the Google summer of code, native language support for GNU/Linux, and number of Internet users per capita.

We encourage you to explore, learn, then improve or build off the Open Source Index. This work is a resource and just the beginning. Analyze the results here or gather the data and change the construction. Whatever you do, share it with the rest of us.

Source: http://www.redhat.com/about/where-is-open-source/activity/

Tuesday, June 2, 2009

Sun xVM VirtualBox


You are MS Windows user and you are about to give a chance to GNU/Linux, but repartitioning your hard drive is a bit difficult and you need time to do this. You are reading the right post now. It is possible to install Slackware and other GNU/Linux operating systems on MS Windows as guest operating system through Sun xVM VirtualBox which is a powerful virtualization program freely available as Open Source Software under the terms of the GNU General Public License (GPL). VirtualBox not only run on Windows hosts but also runs on Linux, Macintosh and OpenSolaris hosts and you can install one or more operating systems as guest on host operating system through VirtualBox. I have guest Slackware and guest Ubuntu on my host Slackware. This guest Slackware is my cavy for experimental use :). My brother also has a guest MS Windows XP installation on his Slackware box, because he needs MS Windows XP for the CAD/CAM software which has only Windows version. This software is preferred by his department for Computer Aided Drawing course.

Installation of VirtualBox is quite easy. Just download the binary package for your OS from the download page of VirtualBox and install it. For detailed installation instructions look at user manual on download page.

For Windows; download "VirtualBox-x.x.x-xxxxx-Win.exe" and just by clicking executable file complete the installation by the guidance of graphical windows installer.

There is no native binary package for Slackware on download page, but there is a binary package (*.run) for all Linux distributions. Download the executable binary package "VirtualBox-x.x.x-xxxxx-Linux.run" and execute file as root by

# ./VirtualBox-x.x.x-xxxxx-Linux.run

or

try to build VirtualBox package from SlackBuilds.org.

After installing VirtualBox, launch the program and start to build your virtual machine by clicking "New" button. First choose VM (Virtual Machine)
name and OS (Operating System) type, then set RAM size, create virtual HDD setting its size and finalize VM creation. Now using "Settings" menu for VM you have created, enable CD/DVD Drive, Floppy, USB and Audio and set video memory size. Be careful on that total virtual RAM and virtual video memory size must be consistent with size of your physical RAM. If total value of the size you assigned for VM's RAM and video memory exceeds the size of physical RAM, your computer get stuck. You can assign physical CD/DVD Drive or ISO Image as virtual machine's CD/DVD Drive, it depends on from which medium you will run guest OS installation. To install a guest OS on your VM, place installation medium, mount it and start VM. After some seconds VM will boot from bootable installation medium that you have inserted. Start installation and finish. After starting guest OS, do not forget to install "Guest Additions" package on guest OS for improvements.

Enjoy!


Monday, June 1, 2009

Printing in Slackware with CUPS


Common UNIX Printing System (CUPS) is the default printing subsystem in Slackware. Latest stable Slackware release (12.2) includes Gutenprint package which is a suit of printer drivers and may be used with CUPS.

To install a printer using CUPS under Slackware:

1. Start CUPS service by

# chmod +x /etc/rc.d/rc.cups

# /etc/rc.d/rc.cups start

or using pkgtool add CUPS to startup services to run.

# pkgtool


(Setup > Services > CUPS Print Server).


2. Connect your printer to computer and reboot system.

3. Connect to CUPS Panel by browsing http://localhost:631/

4. Click on "Add Printer".

5. Describe your printer, choose class and model.

6. Entering root user name "root" and password, finalize printer installation.

For detailed information look at Documentation/Help.

Sunday, May 31, 2009

Slackpkg


slackpkg is a Slackware tool for installing or upgrading packages through a network. If you did only base Slackware installation consisting slackpkg, you can complete remaining packages through network. Latest Slackware stable version 12.2 is shipped with slackpkg in main tree.

Before using slackpkg, you need to choose a suitable mirror for your location and distribution editing /etc/slackpkg/mirrors file. Open /etc/slackpkg/mirrors file as root, uncomment the right mirror for you and save file.

Executing following commands as root updates entire system.

# slackpkg update
# slackpkg install-new
# slackpkg upgrade-all

For more information read slackpkg documentation page.

Slackware Package Management


Slackware Linux Essentials, Chapter 18
Slackware Linux Basics, Chapter 17

Good bye *.tgz, Welcome *.txz!

Fri May  8 18:49:03 CDT 2009
Hello folks! This batch of updates includes the newly released KDE 4.2.3,
but more noticeably it marks the first departure from the use of gzip for
compressing Slackware packages. Instead, we will be using xz, based on
the LZMA compression algorithm. xz offers better compression than even
bzip2, but still offers good extraction performance (about 3 times better
than bzip2 and not much slower than gzip in our testing). Since support
for bzip2 has long been requested, support for bzip2 and the original lzma
format has also been added (why not?), but this is purely in the interest
of completeness -- we think most people will probably want to use either
the original .tgz or the new .txz compression wrappers. The actual
Slackware package format (which consists of the layout within the package
envelope) has not changed, but this is the first support within Slackware's
package tools for using alternate compression algorithms.
Some people have asked why we don't pick a single extension, such as
.slk. While there's certainly a case to be made for that idea, the tools
would still need to support .tgz to handle older packages. Sticking with
".tgz" for everything makes no sense. Using extensions that reflect the
compression format used by the package envelope seems to be the most
transparent approach, and the one that best follows tradition.
As an example of the compression improvement with .txz, have a look
at the kernel-source package:
Before: kernel-source-2.6.29.2_smp-noarch-1.tgz (73808508 bytes)
After: kernel-source-2.6.29.2_smp-noarch-1.txz (49150104 bytes)
The size of the main package tree in /slackware has been reduced from
1.9GB to 1.4GB by converting most packages to .txz.
Most of the packages have been converted from .tgz to .txz, but we
will continue to make the gzip, pkgtools, slackpkg, tar, and xz packages
in .tgz format for the foreseeable future.
Enjoy! And thanks to Lasse Collin for the great work on xz. :-)

Source:ftp://ftp.slackware.com/pub/slackware/slackware-current/ChangeLog.txt

Changing LILO Boot Screen Resolution

It is possible to change size of LILO console fonts when booting Slackware. You can set VGA text mode by simply editing /etc/lilo.conf file.

Open lilo.conf file as root with your favorite text editor.

# nano /etc/lilo.conf

Comment default vga mode with "#" in the "LILO global section" and add folowing uncommented line to the "LILO global section".

vga = x

Decimal x values (VGA Modes) listed in below table. Replace x with a suitable decimal number from the table and save lilo.conf file.

Finally execute following commands as root.

# lilo
# reboot

Here is a sample part of lilo.conf file

...

# Append any additional kernel parameters:
append=" vt.default_utf8=1"
prompt
timeout = 50
vga = 795
# VESA framebuffer console @ 1024x768x256
# vga = 773
...


Slackware the oldest surviving Linux distribution!

Slackware is the oldest Linux distribution that is still actively maintained and supported. It was released in 1993, shortly after the the release of its parent SLS (Softlanding Linux System).

This is a cladogram of GNU/Linux distributions, placed on a timeline.


Image Source: http://futurist.se/gldt/

SlackBuilds.org


The SlackBuilds.org project is maintained by a small group of people, but we want the scripts in our repository to be representative of the entire Slackware user community. There's no way that the few of us can possibly write scripts for all of the extra applications that users want to have, so we depend on YOU to help us out. If there's some application that you use, and we don't have it in our repository already, please consider writing a build script for it and submitting it to us for possible inclusion - see the Submissions page.

One of the frequent criticisms of Slackware is the lack of official packages available. While the official package set provides a good, stable, and flexible operating system (and is quite adequate for many individuals), the fact remains that many users want/need quite a few additional applications in order for it to meet their needs. There are a few well-known third party package repositories, but many users justifiably do not want to install untrusted packages on their systems. For those users, the traditional solution has been to download the source code for desired applications and compile them manually. This works, but introduces another set of problems associated with managing those applications; version updates and such require more of the admin's time than precompiled packages, and lack of notes will often mean that the admin forgot which configure flags were used earlier (as well as any other special issues encountered).

In our opinion, the best solution to this problem is for the admin to automate the compile process using a SlackBuild script. Patrick Volkerding, the maintainer of Slackware, uses SlackBuild scripts to compile the official packages, so it makes sense for us to use the same idea for extra applications we want to add.

Our goal is to have the largest collection of SlackBuild scripts available while still ensuring that they are of the highest quality - we test every submission prior to inclusion in the repository. We do not now nor will we ever provide precompiled packages for any of the applications for which we have SlackBuild scripts - instead, we want the system administrator (that's you) to be responsible for building the packages.


SlackBuild Usage HOWTO

Caveat

All of our scripts are written for usage on the latest stable release of Slackware; if you're trying them on older versions of Slackware, you should read this page referenced in our FAQ.

Step 1 - Download

Download the SlackBuild archive of the application you wish to build and extract it in your build environment. For example, after extracting the chemtool.tar.gz archive, you should have the following directory tree:

./chemtool
|-- README
|-- chemtool.info
|-- chemtool.SlackBuild
|-- chemtool.desktop
|-- chemtool.png
|-- slack-desc

Anonymous ftp access is available via ftp://ftp.slackbuilds.org if that's more convenient for you.

Next, download the source of the application from the address listed in the chemtool.info file and place it in the chemtool directory listed above. There is also a direct link to the source tarball on each application's page within our repository.

Step 2 - Edit SlackBuild script if necessary

If the version of chemtool is newer than what is specified in the SlackBuild script, you will need to change the script accordingly. Using your preferred editor, open the chemtool.SlackBuild script and find the line which starts with "VERSION"

VERSION=1.6.7

Change this line to reflect the current version of the chemtool source.

  • If a newer version of some application does not compile correctly with a simple change of the "VERSION" string, let us know by following the instructions on reporting SlackBuild Bugs.

Step 3 - Execute the SlackBuild Script (as root)

If necessary, make the script executable with chmod and then run the script:

chmod +x chemtool.SlackBuild
./chemtool.SlackBuild

Step 4 - Install the Package

Assuming everything happened according to plan (the compile finished without errors), the finished package should be in the directory declared as "OUTPUT" in the SlackBuild script (this defaults to the /tmp directory). Use installpkg to install it; you'll probably want to move it to some other location for safekeeping after it's installed.

Other Resources

For more information on using, editing, and creating SlackBuild scripts, have a look at these and other tutorials at SlackWiki.org.

Source: http://www.slackbuilds.org/howto/

Adding Users to Sudoers File

Users can execute commands that are usually restricted to the root account using sudo program. The sudo configuration file is /etc/sudoers.

Open /etc/sudoers file with your favorite text editor as root, then remove comment character, #, in front of line "%wheel ALL=(ALL) ALL" and save.

# visudo

or

# nano /etc/sudoers


...
# Uncomment to allow people in group wheel to run all commands
# %wheel ALL=(ALL) ALL

...

Change above line as in below and save file.
...
# Uncomment to allow people in group wheel to run all commands %wheel ALL=(ALL) ALL
...

You need to add your user name to group wheel also.


# gpasswd -a user wheel

(Replace user with your user name)

Now you can execute some privileged commands using sudo as user without becoming root with su. For example it is possible to edit system file inittab as user executing below command.

# sudo nano /etc/inittab

Picture source: http://xkcd.com/149/

Slackware Runlevels

Slackware Linux uses runlevel 1 for maintenance, as on other Linux distributions; runlevels 2, 3 and 5 identically configured for a console (with all services active); and runlevel 4 adds the X Window System.


Source: http://en.wikipedia.org/wiki/Runlevel#Slackware_Linux

To change runlevel, we need to edit inittab file as root.

# nano /etc/inittab
...
# These are the default runlevels in Slackware:
# 0 = halt
# 1 = single user mode
# 2 = unused (but configured the same as runlevel 3)
# 3 = multiuser mode (default Slackware runlevel)
# 4 = X11 with KDM/GDM/XDM (session managers)
# 5 = unused (but configured the same as runlevel 3)
# 6 = reboot

# Default runlevel. (Do not set to 0 or 6)
id:3:initdefault:

...

For graphical login, replace "id:3:initdefault:" with "id:4:initdefault:".

Adding Users to Groups

Users must be added to cdrom, audio, video, scanner, plugdev and power groups. To achieve this run below command as root for each group.

# gpasswd -a user group

For example;

# gpasswd -a ertan plugdev

adds user ertan to group plugdev.

Manually editing /etc/group file as root, one can add one or more users to a specified group also.

# nano /etc/group

...

audio:x:17:root,user1,user2
video:x:18:root,user1,user2
cdrom:x:19:root,user1,user2

...


* It is seen that user1 and user2 are the members of audio,video and cdrom groups.

Sound Configuration

Slackware shipped with ALSA (Advanced Linux Sound Architecture) package.
Be sure /etc/rc.d/rc.alsa is executable, then run alsaconf utility as root to configure your sound card.

# alsaconf


Start ALSA service by:

#
/etc/rc.d/rc.alsa start

Adjust volume levels using command line mixer alsamixer.

$ alsamixer


Run alsactl store as root to store volume levels for next boots.

# alsactl store

Creating User Accounts

Run adduser utility as root for adding new users to system.

# adduser user_name

Replace user_name with desired user name.

To delete an existing user, run userdel utility as root.

# userdel user_name

Adding "-r" option to userdel, user's home directory removed also.